Homemade pasta in KitchenAid mixers really does hang on two things, and neither is the machine. First, the ratio: roughly 100 grams (about 3/4 cup) of flour per large egg. For a standard batch that’s 3 1/2 cups flour, 4 eggs, half a teaspoon of salt, and a tablespoon of water you keep in reserve. Second, a rest. You mix on Speed 2 with the flat beater for a minute, knead with the dough hook for two more, then let the dough sit a full 30 minutes before it ever meets the roller. Nail those and the sheet comes off setting 1 smooth, laminates into a clean ribbon, and cuts into fettuccine that’s done in 2 to 4 minutes of boiling. When a first batch flops, the mixer almost never deserves the blame. It’s dough that was too dry to come together in the first place, then shoved through the rollers anyway. So that’s where we’ll start. After that: attachments, the master dough, a thickness chart you can actually follow, the shapes nobody tells you the roller can make, plus drying, freezing, and knowing when fresh pasta is genuinely cooked.
What You Need: Attachments, Ingredients, and the One Ratio That Matters
A KitchenAid stand mixer makes pasta two completely different ways, and which one you own changes everything about this recipe.
The Two KitchenAid Pasta Attachments
The 3-Piece Pasta Roller and Cutter Set (KSMPRA) is the one most people mean. It clamps into the front power hub and gives you a roller that sheets the dough plus separate spaghetti and fettuccine cutters. This is the attachment this guide is built around, because sheeted-and-cut pasta is where the KitchenAid genuinely shines. The Gourmet Pasta Press (KPEXTA) is an extruder that pushes stiff dough through dies for tubes like rigatoni, macaroni, and bucatini. Extruder dough is drier and firmer than roller dough, so if you are using the press, drop the water entirely and expect a crumbly, sandy texture that only comes together under pressure. Mixing up the two doughs is the single most common reason a batch “fails” for no obvious reason, so check which attachment you actually own before you measure anything.
The Flour-to-Egg Ratio (and Why Your Flour Choice Changes the Water)

Here’s the thing every “3 1/2 cups flour, 4 eggs” recipe skips: flours don’t all drink the same amount of water, which is precisely why so many people end up staring at a bowl of dry crumbs. Treat the egg as your liquid and the flour as the variable, and you stop guessing.
| Flour | Texture & bite | Water to add (per 4 eggs) | Best for |
|---|---|---|---|
| All-purpose | Tender, forgiving | 1 tbsp, as needed | First-timers, fettuccine |
| 00 (doppio zero) | Silky, soft, classic | 0 to 1 tbsp | Tagliatelle, filled pasta |
| Semolina (fine) | Firm, toothy, sturdy | 2 to 3 tbsp | Eggless dough, extruder shapes |
| 50/50 AP + semolina | Tender with backbone | 1 to 2 tbsp | Pappardelle, lasagna sheets |
The takeaway: a 00 flour dough needs almost no added water, while a blend heavy in coarse semolina drinks noticeably more, because its larger granules hydrate slowly. Add water a teaspoon at a time, never all at once, and judge the dough by feel instead of trusting the cup.
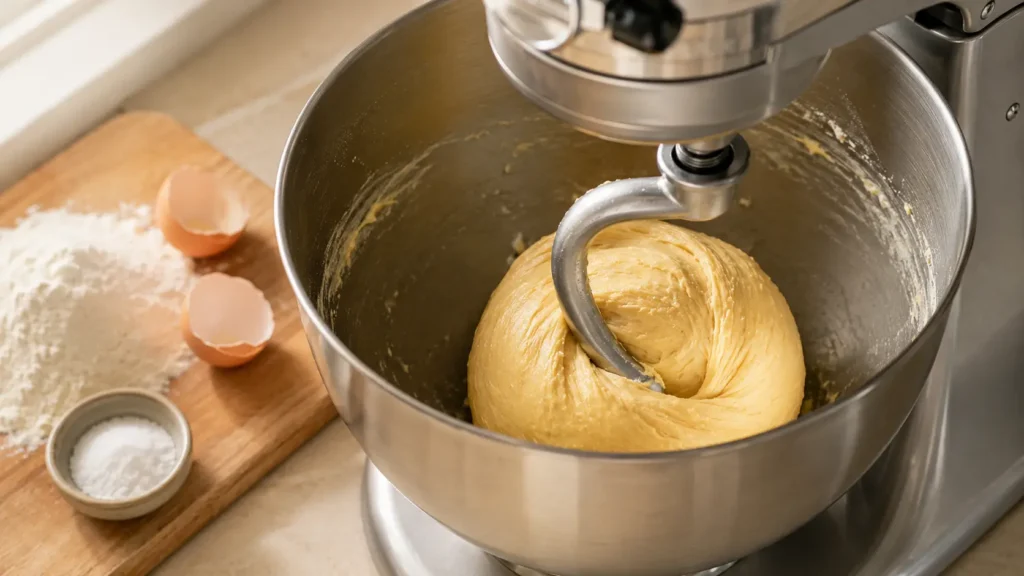
The Master Dough: Step by Step in the Stand Mixer
This makes about 1 1/4 pounds of dough, enough for 4 generous servings.
Mixing and Kneading
Combine 3 1/2 cups flour and 1/2 teaspoon salt in the mixer bowl. Beat 4 large eggs with 1 tablespoon water in a separate cup, make a shallow well in the flour, and pour the eggs in. Attach the flat beater and run on Speed 2 for about 60 seconds, until the mixture looks like coarse, pebbly crumbs that hold together when you pinch them. This pinch test is the moment to judge hydration: if the crumbs stay dusty and refuse to clump, add water 1 teaspoon at a time. Swap to the dough hook and knead on Speed 2 for 2 minutes, then turn the dough onto a lightly floured counter and knead by hand for 2 more minutes until it forms a smooth, slightly tacky ball that springs back slowly when pressed.
The Rest (Don’t Skip It)
Wrap the ball tightly in plastic or a covered bowl and rest it at room temperature for 30 minutes. This is not idle time. Resting lets the flour fully hydrate and relaxes the gluten you just built, so the sheet stretches instead of snapping back at the roller. Skip the rest and the dough fights you at every pass, tears at the edges, and springs back narrower than the roller width. If you need to wait longer, the dough holds in the fridge for up to 24 hours; just bring it back to room temperature before rolling so it stays pliable.
An Eggless Semolina Option
If you are out of eggs or want a sturdier, more traditional Southern-Italian dough, skip the eggs entirely and build the dough from semolina and warm water. Use 2 cups of fine semolina plus about 2/3 cup of warm water, added gradually on Speed 2 with the dough hook until it forms a firm, slightly stiff ball. Eggless dough is less elastic, so rest it a full hour and roll it no thinner than setting 5, where it holds together best. It will not have the golden color or richness of egg pasta, but it gives a clean, springy chew that stands up to bold sauces, and it doubles as a dairy-free, vegan pasta base if you later move to the extruder attachment.
Scaling the Batch Up or Down
The ratio scales cleanly, which makes it easy to cook for one or for a crowd. Hold the proportions and adjust by the egg: 1 egg with roughly 3/4 cup of flour feeds one person, 2 eggs feed two, and 6 eggs with about 5 1/4 cups of flour fills a large pot for a dinner party. The mixer handles up to about 6 eggs of dough comfortably; past that, the dough hook struggles and you are better off mixing two batches. Whatever the size, divide the rested dough into pieces small enough to flatten by hand, because forcing an oversized lump into the roller is another quiet cause of torn, uneven sheets.
Rolling: The Thickness Setting Chart Nobody Gives You
The KitchenAid roller dial runs from 1 (thickest) to 8 (thinnest), and “feed it through until it looks right” is useless advice when you are standing there with a sheet flopping off the counter. Here is what each setting is actually for.
| Setting | Thickness | Use it for |
|---|---|---|
| 1 | Thickest | First passes, laminating |
| 2 to 3 | Medium | Pappardelle, lasagna, thick fettuccine |
| 4 to 5 | Thin | Fettuccine, tagliatelle, spaghetti |
| 6 to 7 | Very thin | Filled pasta (ravioli), capellini |
| 8 | Translucent | Delicate sheets, you can almost read through it |
Laminating: The Fold-and-Feed Step That Builds Strength

Cut the rested dough into 4 pieces and keep three covered so they do not dry out. Flatten one piece by hand into a rough rectangle, set the roller to 1, attach it to the hub, and run the mixer at Speed 2. Feed the dough through, then fold it into thirds like a letter and feed it through again, short edge first. Repeat this fold-and-feed at setting 1 about four times. This is lamination, and it is what turns a ragged scrap into a smooth, even sheet with real structure. Only after the dough is supple do you start climbing the dial, one number at a time, with a light dusting of flour if it feels tacky. Never jump from 1 to 5; skipping settings is how sheets tear.
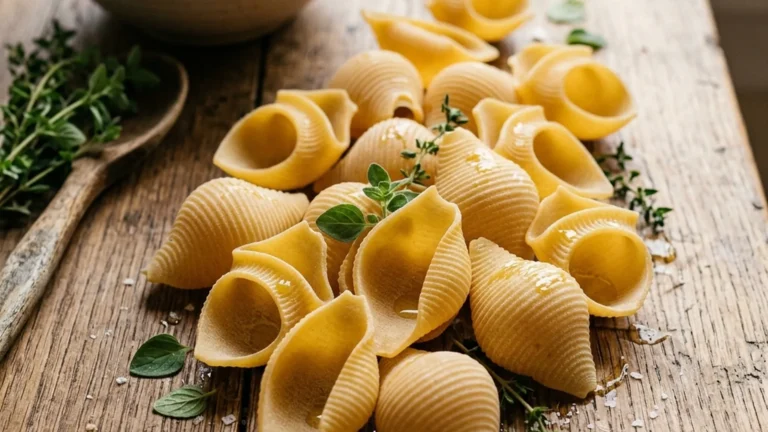
Cutting and Shaping Beyond Fettuccine
The cutter attachments handle the everyday ribbons, but the roller alone unlocks far more shapes than the competing guides mention.
Machine-Cut Ribbons
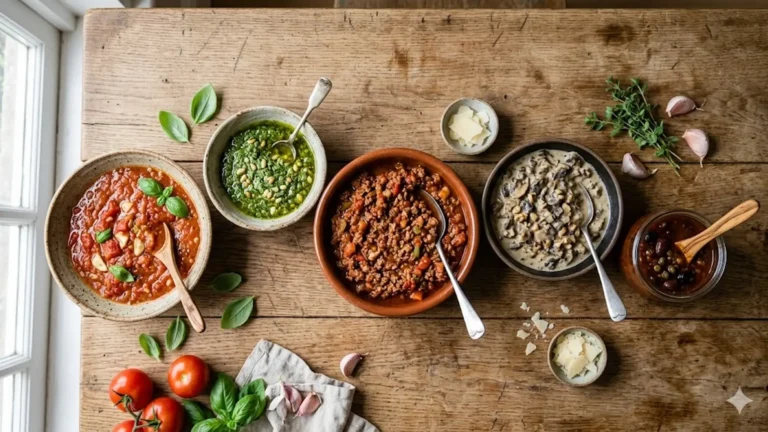
Swap the roller for the spaghetti or fettuccine cutter, run on Speed 2, and guide the sheet through with one hand while catching the strands with the other. Fresh ribbons like these are what a garlic butter mushroom fettuccine was built for. Dust the cut pasta immediately with semolina or flour and toss it into loose nests so the strands do not weld together while you finish the rest.
Hand-Cut and Filled Shapes
For pappardelle, roll to setting 3, lay the sheet flat, and slice 3/4-inch ribbons with a knife or pizza wheel; those wide ribbons are made to carry a clinging sausage ragù. For lasagna sheets, roll to setting 3 or 4 and cut to fit your pan. For ravioli, roll thin (6 to 7), pipe small mounds of filling an inch apart, brush around them with water, lay a second sheet on top, and press out the air before cutting; a smooth butternut squash filling is forgiving for a first try. These shapes need no extra attachment, just the roller you already have, which is why a KitchenAid is more versatile than the brand’s own short recipe page lets on.
Fixing Dry, Crumbly, or Sticky Dough
This is the part the top-ranking recipes leave to their comment sections, where reader after reader reports the same dry-dough problem. Here is how to read your dough and correct it in real time.
Dough Won’t Come Together (Too Dry)
Crumbs still sandy after a minute on the flat beater, and a pinch won’t hold? It’s too dry. Nine times out of ten that’s over-measured flour, or a thirsty semolina blend pulling more water than you gave it. Leave the mixer running on Speed 2 and add water half a teaspoon at a time, waiting about 15 seconds between each. Usually 1 to 3 teaspoons is all it takes. Whatever you do, don’t dump in a whole tablespoon at once, because then you’ve overshot into sticky. The real fix is upstream: spoon flour into the cup and level it off instead of scooping, which is where the over-measuring sneaks in. The team at King Arthur Baking explains the spoon-and-level method well.
Dough Sticks or Tears (Too Wet or Too Warm)
Sticky dough that gums up the rollers got too much water, or your kitchen is warm and the eggs were large. Knead in a tablespoon of flour at a time until the surface is tacky but not gluey. If a sheet tears or develops holes at higher settings, it usually means you climbed the dial too fast or the dough was under-rested; fold it back to setting 1, laminate a few more times, and let it relax 10 minutes. Dough that browns or feels leathery has dried out at the edges, so keep unused pieces covered at all times.
Drying, Storing, and Freezing Fresh Pasta
Fresh pasta is perishable because of the egg, so handle leftovers with intent rather than guessing.
Drying for Short-Term Use
To cook within a day, spread cut pasta in loose nests on a floured sheet pan or drape ribbons over a drying rack or a clean hanger for 30 to 60 minutes until the surface is dry to the touch but still flexible. Fully air-drying egg pasta to shelf-stable hardness is risky at home because the egg can spoil before the strands dry through, so do not store egg pasta at room temperature.
Fridge Versus Freezer
In the refrigerator, dust the nests generously with semolina, seal them in an airtight container, and use within 2 days. To freeze, set the floured nests on a tray until solid, about an hour, then transfer them to a freezer bag where they keep for up to a month. Cook frozen pasta straight from the freezer with no thawing; it needs only an extra minute in the water. Freezing in pre-portioned nests is the move that makes a single mixing session pay off for weeks.
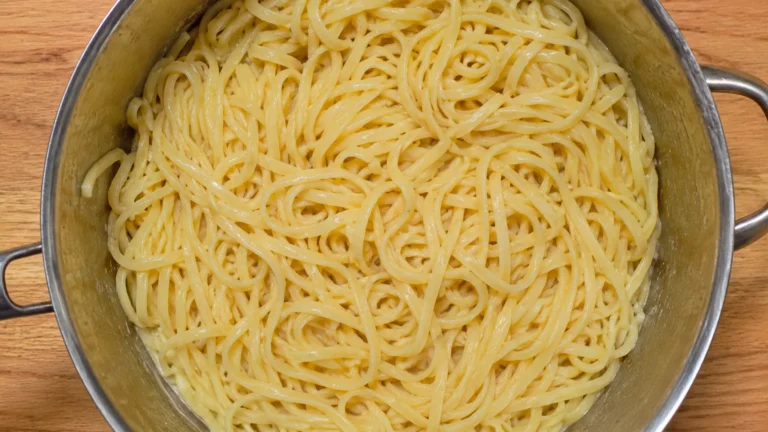
Cooking Fresh Pasta Without Guessing
Fresh pasta cooks far faster than the dried boxed kind, and overcooking is the easiest way to undo all your work. Bring a large pot of well-salted water to a rolling boil, drop the pasta in, and start checking almost immediately. Thin strands like capellini are done in about 90 seconds, fettuccine and tagliatelle in 2 to 4 minutes, and thicker pappardelle or filled pasta in 4 to 6 minutes. The cues matter more than the clock: the pasta floats, turns a shade more opaque, and bites tender with the faintest resistance at the center. Pull it a few seconds early, because it keeps cooking in the sauce. Save a cup of starchy water to loosen and bind the sauce, and you have restaurant-grade pasta from a stand mixer.
FAQ
Why is my KitchenAid pasta dough so dry and crumbly?
The flour was almost certainly over-measured, or you are using a thirsty semolina blend. With the mixer on Speed 2, add water half a teaspoon at a time until a pinch of dough holds together. Spoon and level your flour instead of scooping to prevent it next time.
What speed do I use on a KitchenAid for pasta?
Speed 2 for everything: mixing with the flat beater, kneading with the dough hook, and feeding dough through the roller and cutter attachments. Higher speeds move the sheet too fast to control and can tear it.
Do I have to let the dough rest?
Yes. A 30-minute rest hydrates the flour and relaxes the gluten so the dough sheets smoothly instead of springing back and tearing. It is the single most skipped step and the one that causes the most frustration at the roller.
Can I make pasta in a KitchenAid without the pasta attachment?
You can mix and knead the dough with the flat beater and dough hook, then roll and cut it by hand with a rolling pin and knife. The roller attachment just makes the sheets thinner and more even than most people can manage by hand.
What flour is best for homemade pasta?
All-purpose is the most forgiving for beginners, 00 flour gives the silkiest classic texture, and semolina adds firm, toothy bite. A 50/50 blend of all-purpose and semolina is a sturdy all-rounder for ribbons and lasagna sheets.
How long does fresh pasta take to cook?
Much less than dried: roughly 90 seconds for thin strands, 2 to 4 minutes for fettuccine, and 4 to 6 minutes for thick or filled shapes. It is done when it floats and bites tender with a faint center resistance.
Can I freeze homemade pasta?
Yes. Dust cut pasta with semolina, form loose nests, freeze them solid on a tray, then bag them for up to a month. Cook straight from frozen with about one extra minute in the water.
Bottom Line
The mixer takes the labor out of fresh pasta, but it can’t save a dough that started out too dry. Get the flour-to-egg ratio right, trust the pinch test on hydration, give it the full 30-minute rest, and move up the roller dial one number at a time. After that the KitchenAid does the work, and you get fettuccine or pappardelle or ravioli that cook in minutes and taste like a Sunday you didn’t actually have to spend in the kitchen. Best part: mix once, freeze the extra in nests, and one afternoon of work quietly feeds you for weeks.