Homemade pasta comes down to three things done well: the right flour-to-egg ratio, enough kneading to build the gluten, and a rest that lets the dough relax before you roll it. Get those right and you can turn a pile of flour and a few eggs into silky fettuccine in under an hour, most of which is hands-off resting time. The reason store-bought fresh pasta never quite matches what you make at home is simple: a homemade sheet is rolled thinner, cooked in two to three minutes, and tastes of egg and wheat rather than packaging. In this lab guide I break down exactly how much flour and egg to use by weight, why hydration matters more than any recipe wording, how to knead and rest so the dough rolls without tearing, the real differences between 00 flour, semolina, and all-purpose, and how to fix the dough when it comes out too dry, too sticky, or cracking at the machine.
The Ratio: Flour and Egg by Weight
The classic Italian starting point is one large egg per 100 grams of flour, scaled to how many people you are feeding. One egg and 100 grams of flour makes roughly one generous portion, so a dinner for four wants about 400 grams of flour and 4 eggs. That ratio works because a large egg in the United States weighs close to 50 grams without the shell, which lands the dough near 50 percent hydration once you account for the egg being mostly water. Recipes that read in cups are guessing at this, because a cup of flour can vary by 20 grams depending on how you scoop it, and that swing is the single biggest reason a recipe behaves differently in two kitchens. Weigh the flour and you remove that variable.
Many cooks push the richness and workability up by adding an extra yolk or two. A common lab-friendly formula is 300 grams of flour with 2 whole eggs plus 3 yolks, which raises the fat and color and gives a more tender, golden sheet that is easier to roll thin. Yolks add fat and emulsifiers that make the dough supple; whites add structure and a touch of chew. Tune the balance to the shape: more whole eggs for sturdy cut noodles like tagliatelle, more yolks for delicate filled pasta like ravioli where you want a tender, almost translucent sheet. If you want the protein math behind the noodle itself, our guide to high protein pasta breaks down how egg and flour each contribute.
A Working Table for Servings
| Servings | Flour (g) | Whole eggs | Optional extra yolks |
|---|---|---|---|
| 2 | 200 | 2 | 1 |
| 3 | 300 | 3 | 2 |
| 4 | 400 | 4 | 2 |
| 6 | 600 | 6 | 3 |
Treat the egg count as a target, not a law. Flour absorbs water differently by brand, age, and the humidity in your kitchen, so the dough tells you what it needs as you mix. The fix for a dough that will not come together is a teaspoon of water at a time; the fix for a sticky dough is a dusting of flour. You are aiming for a dough that feels firm and a little dry when it first forms, because it will soften as the flour fully hydrates during resting.
Choosing the Flour: 00, Semolina, or All-Purpose

The flour you reach for changes the texture more than any other single choice, and there is no single correct answer. Tipo 00 is finely milled soft wheat with a powdery feel, prized for egg pasta because it rolls into a smooth, silky sheet that takes sauce gently. Semolina is coarsely ground durum wheat, higher in protein, and it gives a firmer, more toothsome bite with a rougher surface that grips sauce; it is the classic choice for eggless, water-based shapes like orecchiette and for adding structure to extruded pasta. All-purpose flour is the most available and makes perfectly good fresh pasta, landing between the two in texture with a slightly less silky feel than 00.
A practical approach for a home cook is a blend. Mixing roughly 70 percent 00 (or all-purpose) with 30 percent semolina gives you the smooth handling of soft wheat plus the firmer bite and sauce grip of durum. Pure 00 is best for filled pasta and the most delicate ribbons; pure semolina suits sturdy hand-formed shapes. Whichever you use, sift if the flour is lumpy, and know that semolina needs a touch more liquid because durum absorbs more water. For a wider view of how flour relates to the noodles you buy in a box, our breakdown of the category of pasta connects flour types to shapes and uses. America’s Test Kitchen has run extensive comparisons of flours for fresh pasta at America’s Test Kitchen, and the takeaway matches: match the flour to the shape and the bite you want.
Mixing and Kneading: Building the Gluten
You can mix the dough by the classic well method or in a bowl, and the result is the same if the ratio is right. The well method puts the weighed flour in a mound on the counter, makes a crater in the center, cracks the eggs in, and uses a fork to whisk the eggs while slowly pulling flour from the inner walls of the well. Once it is too stiff to fork, you switch to your hands and bring it into a shaggy ball. The bowl method does the same thing with less mess and is friendlier for beginners. A food processor works too: pulse flour and eggs until the mix looks like coarse crumbs that hold together when pinched, then turn it out and knead.
Knead Until It Feels Like Modeling Clay
Kneading is not optional. It aligns and strengthens the gluten strands that give fresh pasta its elastic stretch and its bite. Knead by hand for 8 to 10 minutes, pressing the heel of your hand into the dough, folding it over, rotating a quarter turn, and repeating. The dough starts rough and a little dry and becomes smooth, firm, and springy, like soft modeling clay. A reliable doneness test is to press a finger into the ball; if it slowly springs back, the gluten is developed. Underkneaded dough tears when you roll it and cooks up slack; overkneaded dough by hand is nearly impossible to reach, so do not worry about it unless you are using a stand mixer, where 4 to 5 minutes on low is plenty.
Rest So It Stops Fighting You
After kneading, wrap the dough tightly in plastic or an airtight bowl and rest it at room temperature for at least 30 minutes, and up to 2 hours. This step is where most rushed batches fail. Resting lets the flour fully hydrate and the gluten relax, so the dough rolls out smooth and stretches instead of snapping back. Skip the rest and the sheet fights you, springs back at the machine, and tears at the edges. The dough should never dry out during the rest, so keep it sealed. You can rest it in the refrigerator for up to a day; bring it back toward room temperature before rolling.
Rolling: By Machine or by Hand
A pasta machine, whether a hand-crank Atlas or a stand mixer attachment, makes rolling consistent and is worth it if you make pasta more than a few times a year. Cut the rested dough into 4 to 6 pieces and keep the ones you are not using covered so they do not dry. Flatten a piece into a disk, dust it with flour, and feed it through the widest setting. Fold it in thirds like a letter, rotate, and pass it through the widest setting a few more times; this laminating step squares the edges and strengthens the sheet. Then step the setting down one notch at a time, passing once or twice per setting, until you reach your target thickness.
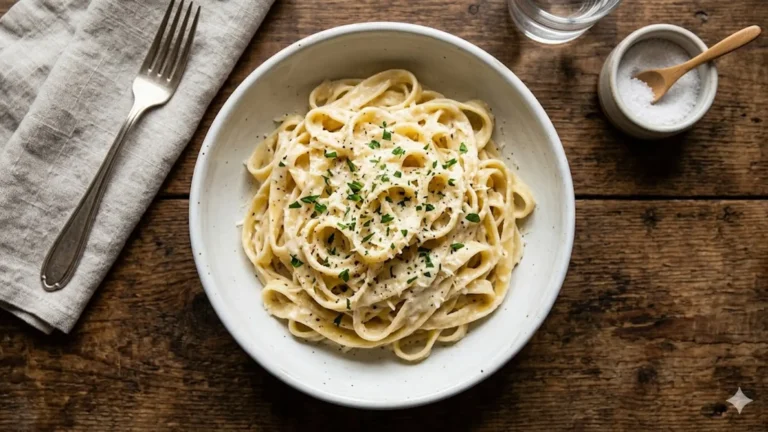
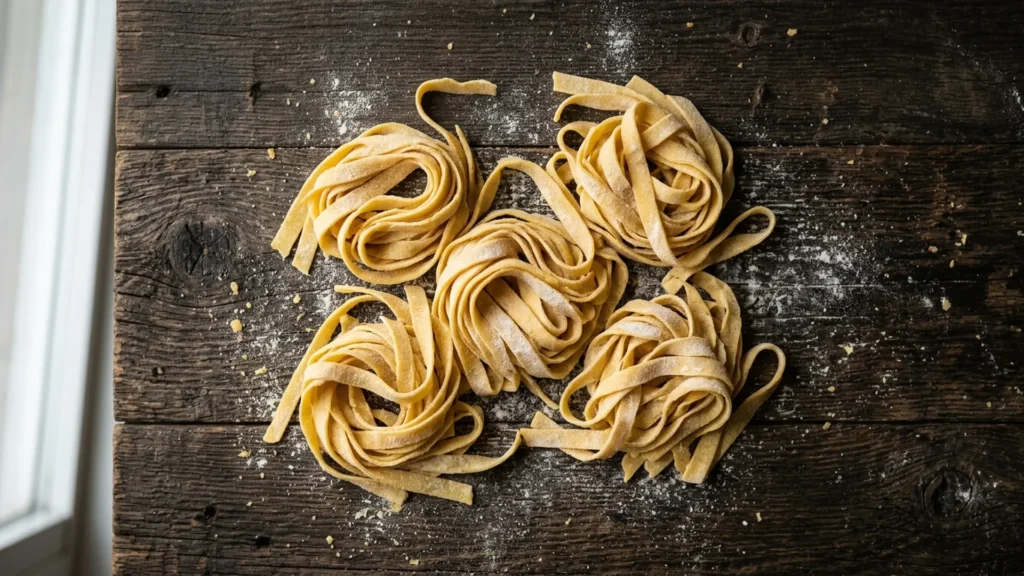
For ribbon pasta like fettuccine and tagliatelle, stop around setting 5 or 6 on a typical Atlas, where the sheet is about 1/16 inch thick. For filled pasta like ravioli, go thinner, to setting 6 or 7, until the sheet is slightly translucent and you can just see your hand through it. By hand with a rolling pin, the goal is the same thinness; roll from the center outward, rotate often, and keep the surface lightly floured. Hand-rolling takes more muscle and patience but produces a beautifully rustic, slightly thicker noodle that holds chunky sauces well. Whichever method you use, dust the finished sheets and cut noodles with semolina or flour and toss so they do not stick together while you finish the batch. The noodles should hang or rest in loose nests, never in a clump.
Cooking Fresh Pasta: Fast and Watchful
Fresh homemade pasta cooks far faster than the dried box, and this is where good dough gets ruined by a distracted cook. Bring a large pot of water to a rolling boil, at least 4 quarts for a pound of pasta, and salt it well so it tastes like a seasoned soup; this is your only chance to season the noodle itself. Drop the fresh pasta into the boiling water and start watching immediately. Thin ribbons are done in 2 to 3 minutes, often as soon as they float and turn tender; thicker hand-cut noodles and filled pasta take 3 to 5 minutes. There is no al dente window of several minutes here as there is with dried pasta; fresh pasta goes from raw to done to overcooked quickly, so taste a strand starting at the 90-second mark.
Reserve a cup of the starchy cooking water before you drain, because that water is the key to a sauce that clings rather than slides off. Drain but do not rinse, finish the pasta in the warm sauce for 30 to 60 seconds, and loosen with splashes of the reserved water until the sauce coats every strand in a glossy film. If you have ever pushed a batch too far, our guide to overcooked pasta covers how to recognize it and what to do with the result. Cook’s Illustrated has detailed the science of salting and starchy water at Cook’s Illustrated, and the rule holds for fresh pasta too: salt the water, save the starch.
Drying, Storing, and Freezing

Fresh pasta is best cooked within an hour or two of cutting, but you have good options for keeping it. To hold it for a few hours, dust the noodles generously with semolina, form loose nests on a floured tray, and leave them uncovered at room temperature. For overnight, refrigerate those nests on a tray loosely covered, but use them within a day because the egg dough can develop off flavors and the noodles soften. To dry pasta hard for shelf storage, hang ribbons over a wooden dowel or lay them flat until they are brittle, which takes 12 to 24 hours depending on humidity; fully dried egg pasta keeps for a few weeks in an airtight container but is more fragile than commercial dried pasta.
Freezing is the most reliable make-ahead method. Freeze the floured nests on a tray until solid, about an hour, then transfer them to a freezer bag; they keep for up to a month. Cook frozen pasta straight from the freezer without thawing, adding about a minute to the cook time, since thawed fresh pasta turns sticky and clumps. Filled pasta like ravioli freezes especially well this way and is best cooked frozen so it does not split. Whatever the method, the enemy is moisture and clumping, so keep the noodles well floured and separated until they are frozen or fully dried.
Troubleshooting the Dough
Most homemade pasta problems trace back to hydration or resting, and they are easy to read once you know the signs. A dough that will not come together and stays crumbly is too dry, usually because the flour absorbed more than the eggs could hydrate; knead in water a teaspoon at a time until it forms a cohesive ball. A dough that sticks to everything is too wet; work in flour a tablespoon at a time. A sheet that tears, cracks at the edges, or springs back at the machine almost always means the dough was underrested or underkneaded, so wrap it and wait 20 more minutes and it will usually roll smooth.
If cooked noodles turn out gummy or pasty, the sheet was too thick or the water was not at a hard boil; thinner sheets and more vigorous, well-salted water fix it. If they fall apart in the pot, the dough was too wet or overcooked, so add a touch more flour next batch and pull the pasta sooner. White flecks or a marbled look in the sheet usually mean the flour was not fully incorporated, which a longer knead and rest will smooth out. Bon Appetit keeps a running set of fresh-pasta troubleshooting notes at Bon Appetit that lines up with these fixes: adjust hydration first, rest longer second, and only then change the recipe.
Equipment You Actually Need
You can make excellent homemade pasta with nothing but a bowl, a fork, a rolling pin, and a knife, so do not let gear stop you. That said, a few tools earn their place if you make pasta regularly. A kitchen scale is the highest-value purchase, because weighing flour and eggs is what makes the dough repeatable. A hand-crank roller or a stand-mixer roller attachment saves your arms and gives a more even sheet, which matters most for filled pasta and very thin ribbons. A bench scraper helps with mixing and cutting, and a drying rack or even a clean broom handle between two chairs works for hanging ribbons. Cutter attachments are a convenience, not a necessity, since a sharp knife cuts tagliatelle just fine once the sheet is rolled. Start with the scale and a rolling pin, and add a roller when you find yourself making pasta often enough to want one.
FAQ
What is the best flour for homemade pasta?
Tipo 00 makes the silkiest egg pasta and rolls thinnest, which suits ribbons and filled pasta. Semolina gives a firmer, chewier bite that grips sauce and suits sturdy hand-formed shapes. All-purpose works well and is the most available. A blend of about 70 percent 00 or all-purpose with 30 percent semolina gives you smooth handling plus a firmer bite.
What is the ratio of flour to eggs for fresh pasta?
The classic ratio is one large egg per 100 grams of flour, scaled to servings, which lands the dough near 50 percent hydration. For richer, more tender dough, use fewer whole eggs plus extra yolks, such as 300 grams of flour with 2 whole eggs and 3 yolks. Weigh ingredients, then adjust with a little water or flour as the dough tells you.
How long do you knead and rest pasta dough?
Knead by hand for 8 to 10 minutes until the dough is smooth, firm, and springs back slowly when pressed, or 4 to 5 minutes in a stand mixer. Then wrap it tightly and rest at room temperature for at least 30 minutes, up to 2 hours. The rest lets the flour hydrate and the gluten relax so the sheet rolls smooth instead of snapping back.
How long does fresh homemade pasta take to cook?
Far less time than dried pasta. Thin ribbons cook in 2 to 3 minutes, often as soon as they float and turn tender. Thicker hand-cut noodles and filled pasta take 3 to 5 minutes. Fresh pasta moves from raw to overcooked quickly, so start tasting at about 90 seconds and pull it the moment it is tender.
Can you make homemade pasta without a machine?
Yes. A rolling pin and a knife do the job. Roll the rested dough from the center outward on a lightly floured surface, rotating often, until it is about 1/16 inch thick or thinner for filled pasta. Hand-rolling takes more effort and gives a slightly thicker, rustic noodle that holds chunky sauces well. A scale matters more than a machine.
How do you store fresh pasta so it does not stick?
Dust the cut noodles generously with semolina or flour and form loose nests on a floured tray. Hold a few hours at room temperature uncovered, or refrigerate up to a day loosely covered. For longer storage, freeze the nests on a tray until solid, then bag them for up to a month and cook straight from frozen, adding about a minute.
Bottom Line
Homemade pasta is a forgiving project once you treat it like a ratio rather than a recipe. Weigh your flour, start near one egg per 100 grams, knead until the dough feels like soft clay, and rest it so it stops fighting you. Pick the flour to match the shape you want, roll the sheet thin and even, and cook it fast in well-salted water while you watch it like a hawk. Reserve some starchy water to bind the sauce, store any extra well floured and frozen, and read the dough when it misbehaves: hydration first, more rest second. Do that and a few cents of flour and eggs become a plate that no box can match.